This is the second way to get the Godfather effect on a photo.
Basically , what you have to do is once you opened the image in photoshop , go to Image -> Adjustments -> Threshold . Play with it until you get the desired effect. After that , just paint the background black so it all blends together .
Once you're done with this :
THE GODFATHER LOGO

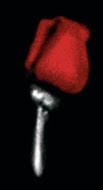
THE ROSE

Save them both to your computer , and open them in Photoshop.You should now have something like this :
For the rose:
Go in photoshop on the window where you have the rose , and press CTRL + A . This will select the whole image . Press CTRL + C after you selected the image , and then , go to your own picture window , and press CTRL + V to paste the rose image there . You might notice that it's not the proper size . While on the rose layer , press CTRL + T to free transform the rose . After you got it to the size you need , press enter. Go to the first tool from your Tools Bar . And move the rose till you get it in the right position.
For the Godfather logo:
Repeat the whole operation you did for the rose , and adjust the logo to the correct position.


0 comentarii:
Trimiteți un comentariu